I recently decided to replace my central heating programmer with a programmable thermostat, and decided to go for the geeky option: a wi-fi connected model! So I ordered a PRT-TS Wi-Fi from Heatmiser, which can be controlled both via a Web browser and an iPhone app.
Overall, I’m happy with the product but I found it a little tricky to set up. The instructions don’t go into a huge amount of detail, a problem which is compounded by the fact that the Heatmiser support site was devoid of any information on this particular model at the time of writing, so I have discussed my difficulties below and explained how I resolved them.
Installation
I won’t go into too much detail on the physical installation, but suffice to say, most people should get the unit fitted by a qualified electrician. There’s only a page and a half of the small (A7 size) manual devoted to it, plus three wiring diagrams, and any mistakes could damage the thermostat and/or the boiler. The thermostat is designed to be flush mounted into a standard 35mm deep single back box. It can be surface mounted but it won’t look as good, particular as the thermostat is a few centimetres larger than the back box at each edge. I chose the latter option to save money, but will have it flush mounted at a later date. I will be interested to see what effect flush-mounting has on the Wi-Fi signal strength, if any.
Appearance & usability
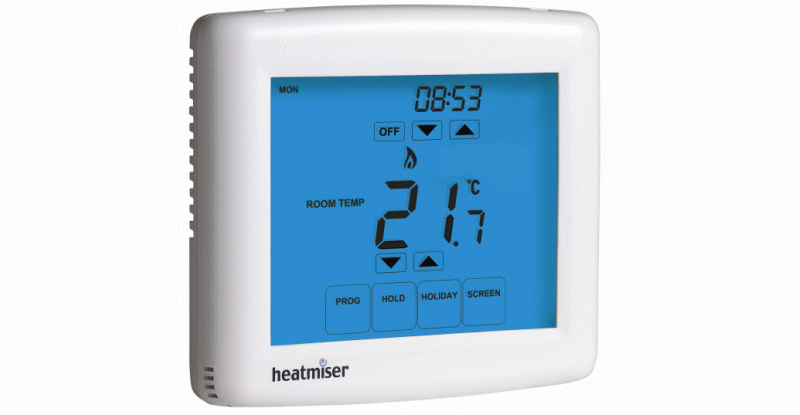
The thermostat is essentially a PRT-TS with an added Wi-Fi card, and it looks exactly the same from the outside. It’s reasonably modern-looking (as far as thermostats go!) with a touchscreen illuminated by a blue backlight. It displays the room temperature in the middle of the screen, which can be adjusting using the up/down icons below it. A slight niggle is that it can be difficult to see what you are doing – the backlight doesn’t come on until you touch an icon, by which time it is too late. I would personally prefer the backlight to come on when touching any part of the screen (not just an icon) and the unit to only respond to icon presses when the backlight is on.
A nice feature is the “Screen” icon which locks the screen for 15 seconds, allowing time to clean it without accidentally activating any functions.
You can also view and set heating programmes, set the clock, enable temperature hold and holiday modes from the touch screen. I found setting the time slightly strange, as the down button changes the hour down and the up button changes the minute up – changing the date works in a similar way with the month and day – but this is something that is rarely necessary to change and can be done from the Web interface or iPhone app anyway.
Wi-Fi setup
Setting up the Wi-Fi connectivity nominally requires a Windows PC and the configuration utility supplied on CD. However, when plugged in via USB, the device presents itself as a USB mass storage device (albeit a very small one: 6.5KB) containing a single file – CONFIG.TXT – which contains the network configuration information in plain text, which could easily be edited by hand by users of other platforms such as Mac or Linux. The file is fairly self-explanatory – the only thing worth pointing out is that the KEYMODE parameter (wireless encryption type) must be either WPA, WEP or OPEN. There’s a slight security issue in that if someone were to steal your thermostat, they’d have access to your wireless key, thermostat password and PIN, but this is a fairly unlikely scenario!
I had trouble getting the unit to connect to my Wi-Fi network until I switched my router (Linksys WRT54GS with Tomato firmware) from WPA only to WPA+WPA2 encryption. I’m not sure whether this means that the PRT-TS needs WPA2 encryption to operate (despite the configuration utility only showing WPA), or whether there is an issue with my particular router, but if you’re having trouble, it’s worth enabling WPA2 on your router. Before I managed to get WPA+WPA2 working, I tried using WEP encryption as a test but the configuration utility wouldn’t let me save the changes. I didn’t play with the OPEN option, so I’m not sure whether this refers to unencrypted Wi-Fi (and therefore will ignore any username/password) or WEP Open System encryption.
The device requires a static IP address, and port 8068 must be forwarded via the router if remote connection via the iPhone app is required.
It’s worth noting that the front part of the thermostat detaches from the rear, so it can easily be removed once installed, and the front part will power up when attached via USB which means you can set up and test the Wi-Fi connectivity before installing the unit on the wall. This isn’t mentioned in the manual, and neither is the fact that a Wi-Fi icon (similar to the one used on the iPhone) appears on the display when connected successfully.
Browser interface
The browser interface is full-featured if a little basic-looking – it’s reminiscent of a router interface from ten years ago. The so-called “Live View” panel on the right shows the actual temperature (to one decimal place), set temperature and heat status, and a refresh button as it doesn’t seem to auto-refresh. The main interface allows you to view and adjust heating programmes, temporarily override the temperature, lock the keypad remotely, set the clock and change network settings. There doesn’t seem to be a way to change the port on which the Web interface is accessible, which would be a nice feature to have.
It doesn’t contain any form of logging functionality, so it’s not possible to view temperature changes over time. This would be nice to see in a future firmware update, but I’n not holding my breath.
iPhone app
The iPhone app, a free download from the App Store, is similarly utilitarian. It allows you to see the current temperature (rounded to the nearest degree, unlike the browser interface), set temperature (which can be adjusted) and heat status. You can also view and adjust heating programmes via the app.
One quirk of the app is that you have to select whether you want to connect locally (i.e. when you are on your home Wi-Fi network) or remotely (via the Internet). It would be nice if the app could determine whether you are home or away and select the corresponding connection method dynamically.
The interface is fairly bland but it does the job. It’s a shame that the graphics aren’t retina ready, so they look jaggy on the iPhone 4 (which has been out for more than a year, so you would have expected Heatmiser to have updated their app!). It would also be nice if a future version of the app came with iPad support – the current version works fine on the iPad but doesn’t take advantage of the bigger screen.
I was left scratching my head for a while, as I was originally able to connect via my Web browser but not via the iPhone app. This resolved itself once I moved my router closer to the thermostat, so it seems that the protocol used by the iPhone app is less forgiving of low signal strength (and potential packet loss) than standard HTTP over TCP/IP. Again this is something that should perhaps be mentioned in the manual.
Conclusion
It’s a version 1 product, so is sometimes a little rough around the edges, but the hardware is solid and the product could easily be improved with updates to the Web interface and iPhone app. The manual is fairly basic, which I can understand is necessary to minimise the size and weight of the box, but why not include a more detailed version on the included CD and/or on the Web?
One final point is that I was slightly perturbed to find that the thermostat, which I paid £150 plus delivery for via Heatmiser’s own shop, is available for as little as £126 delivered from some resellers, so it pays to shop around!
Update
Heatmiser tweeted me and pointed me towards their document download area which contains some useful information. They also say they’re working on a new version of the iPhone app, iPad and Android support, multi-zone and logging functionality, and suggest that users email support@heatmiser.co.uk with any further suggestions.
Also, the £126.20 price I found is actually ex-VAT (thanks Luke!) so it is actually best to buy from Heatmiser directly.


I have the same thermostat but I am having real problems logging on from a browser, the iphone app works fine but I cant log on using my windows phone inside the house and we tried logging on from a pc at work and that didnt work either.
We have also forwarded port 80.
Good review Chris, encouraged me to also buy this product.
For info, I went in search of the £126 price. Found it at one website, but turns out was excluding VAT (not obvious until you get to the final payment page). In the end bought straight from the source.
Now I just need to figure out how to connect it properly…
Thanks for the comment, Luke – glad you enjoyed my review and found it useful. I guess you found the same site as me (Hypocaust) – I hadn’t noticed that they sneakily add VAT at checkout. For this reason, I won’t link to them and certainly don’t recommend buying from them…
Chris – check out the document download area which I have now linked to in the post, and if you don’t have any joy, I’d recommend contacting Heatmiser for support.
I’m also having problems connecting to the unit from a web browser. iPhone app works just fine, tested it both internally and externally with port 8068 open.
But, just browsing with ie9 on port 80, I get nothing. Also tried port 8068, but no luck.
Did anybody find a solution ? I’ve emailed Heatmiser, but don’t expect a response till next week now, but will update the post when I find the solution.
Also, should emphasise the point that the front of the thermostat does come off to reveal the panel with screw holes. This is very poorly explained in the installation manual.
Eagerly awaiting the Android app !
Just bought one via ebay, was a few quid cheaper than from source. Had planned to buy from Hypocaust but they never accepted my paypal payment so that was cancelled after 3 days of waiting (no response from them at all).
Will be interesting to see how easy it is to set up, it shouldn’t be THAT hard (should it?)
Has anyone figured out a way to either send commands to or pull data from the programmer yet? My eventual aim is to add this in to my home automation which is PC controlled although the main reason for getting is to look good on my wall and get rid of the unsightly horstmann timer and programmable room stat, the wifi is just a bonus and a geeky gadget.
P.S. Is it not port 8086 which needs forwarding not port 80?
Joel,
Open ports 8068 and 80 on your router.
8068 is purely for the iphone app (and any third party stuff that uses the info that way).
Port 80 is for the web page like you’ll see on your home network.
Set mine up last night in no time and no problems. As I use port 80 for forwarding to another machine I had to use another public port and forward this to the heatmisers ip port 80.
All is working perfectly today from work. I can view on the iphone app and web browser.
Check your router not your stat. Ask your router manufacturer not heatmiser. It’s a port forwarding/routing issue.
As for installation, that was simple. As with all stats these days, find the push in clip, push it with a flat screwdriver, remove cover. Fit wires to correct terminals (not hard, just google for the s-plan, y-plan etc diagram). Upgrading from an old Horstmann was simple enough, just find the horstmann wiring diag, find what terminals 1 to 6 do, transfer the cables to the correct ones (plus L & N). Other than the heatmiser having hw and ch no and nc labels not heat on, heat off, hw on, hw off but simple to figure out. No earth which meant a connector block but no harm there.
Seriously, I cannot see why so many people have these problems. Always willing to advise if anyone gets stuck though, twitter @richpyke
i too had problems with ie9 but no issues with firefox
with url http://yourdnshost:8068
i am able to connect with my iphone locally but it wont connect externally.. have not figured out why :-(
Hope this helps
Hi Wayne, have you forwarded ports 8068 and 80 on your router (as suggested above by Rich)?
i had my iphone and ipad both connected to the stat and then had a power cut and now cannot reconnect
internet works fine but cannot use app anymore ????
I tried forwarding to port 80, but it did not help :-(
so I have firefox which works to the external address on port 8068 and iphone which works on the internal address.. cant think what else I can try :-(
having fun programming though, i have knocked up a simple powershell script to monitor the settings on an hourly basis to record them to an excel database so i can chart them to a graph.
tried the perl scripts offered in http://code.google.com/p/heatmiser-wifi/ but was unable to get them to work :-(
Thanks
Wayne
i found that i had screwed up on my port forwarding such that 8068 was being forwarded to port 80 :(
anyway i now have port forwarding correct on both 8068 to 8068 and 80 to 80; port 80 now works both internally and externally
however the iphone app does not work at all either internally (which did work) or externally :( [same as Darren above]
Just bought one few days ago and i can’t get the wifi to work :(
Tested with every WPA options and still nothing
I unfortunately had one of the none wifi (wireless)units installed last year. They are poorly made. I’m on my fourth now and when they fail I’ve been left without hot water and heating as there is no maunal override on the reciever to switch the hotwater/heating on in emergencies. No local stockists mean there is no quick turn around to replacing parts. I’ve been dependant on mail order /internet delivery and cosidering I’ll be on my fourth one next week it makes repair a slow and painful process.
I have just successfully installed the Heatmiser PRT-TS WiFi with working local and remote connections! yey it was a little bit painfull but i got there in the end.
First of all the local wifi connection will not work unless you have Wireless mode 802.11 b set on your router. I have b+g+n setup. just a note to say your router will only revert to b while transfering data from the unit. so you should not see much difference in wifi speeds.
Remote set up.
This was more tricky. I set up a dynamic dns address on no-ip.com and could not work out how to remove the 80 ports because the site wont let you, or i couldnt work out, (im no network expert) how to directly set up a dns forwarding to my direct ip address. Finaly I used http://www.dnsdynamic.org which lets you forward your chosen domain direct to your dynamic ip address. Then with ports 80 and 8068 forwarded to the heatmiser i can now access the wifi thermostat from my web browser (80) and the iphone app (8068).
Hope this helps!?
As this thermostat is not evolutive at all I would not recommend to buy it and wait for next generation. You’ll have to send your device to Heatmiser for a single firmware update, its just crazy. Hardware is poor : class B wifi chip, LCD display with predefined labels, not flashable chip, WPA security not working with some routers,…
Just found another flaw.. fails to connect on wifi channel 13?!?!
I bought the PRT-TS. I installed it fine and managed to set it up. It connected via wifi, and with the app, locally and away. Has worked for about a month and Last week I upgraded the app and after a couple of days it has stopped working, saying it can’t connect connect to the thermostat, although nothing has changed. Please help!
Hi Michael, I had a similar problem recently after installing my new Virgin Media Super Hub – although the SSID and password were correct, the thermostat was showing the wi-fi symbol and I could connect via the web interface, the iPhone app wasn’t working.
Turns out that the thermostat needs a strong signal for the app to work, so try repositioning your router closer to the thermostat if possible.
Also check that the PIN number in the app is correct, and that you’ve entered the right internal and external IP addresses.
I have one of these and it is sending out a constant stream of wifi chatter to all devices on my network – it is absolutely trashing my android device battery life! Heatmiser support are no help – device appears to just be programmed by people who know nothing about networking!
Can anyone help me? I’ve set up my unit and it works perfectly from a web browser but I can’t get my android app to talk to it. I am pretty sure it’s because I can’t get my router to open port 8068. Even though port 80 works fine!
I’m on O2 with their Thomson router, but they offer NO support on port forwarding!
Can anyone help opening port 8068 on this unit?
Many thanks :o)
P.S. I love the functionality of the Heatmiser unit, it’s just the need for port 8068 that’s driving me mad!!!
I don’t know why so many have issues setting these up. I’ve set up mine plus a few others now and had few problems (none if I exclude the firmware issues which I will touch on in a moment).
Step 1. Plug the heatmiser in to the PC via USB, set up the settings as explained in the instructions. (Basically, set the IP, the wieless key etc.)
Step 2. Remove from USB and fit the heatmiser and power up
Step 3. It should connect to the network if step 1 was done correctly. Try it by opening your browser and going to the IP you set in Step 1.
If that works the stat is fine. Now you need to set up the port forwarding! If it doesn’t connect now check the settings. It’s also a good idea to check any mac filtering, ip filtering etc. in the routers settings.
For remote access outside of your wireless network you must set up port forwarding on your router. Each router is different but I’ve not come across one yet that doesn’t have the option. It’s usually in advanced options.
Forward port 8068 to the IP of your stat in your router.
Go to http://www.canyouseeme.org/
On the left it should say your current IP and under that should be “80” in a box called What Port?. Delete the 80 and change to 8068.
Hit Check Your Port
If it’s working it will say;
“Success: I can see your service on xxx.xxx.xxx.xxx on port (8068)
Your ISP is not blocking port 8068”
Otherwise you still have issues with port forwarding. Triple check the router settings and make sure port forwarding is active. Some routers need it activating, some need each rule activated individually.
If you are still stuck, find out which router you have. Manufacturer, model and firmware revision. Email this information to me (my details are on my website which should be linked to my name above, if not it’s http://www.rpcs.info) and I will advise further.
Now, I mentioned firmware issues with the Heatmiser. I had a few issues with not being able to connect via the iPhone app/Port 8068. This caused my homebrew logging to stop collecting data so I knew when it happened, how often etc. and it was a pain.
It seems there is an issue with the Heatmiser 1.4 firmware (and possibly all before and including 1.5) which causes errors when connecting to some routers. The solutions?
First check the firmware/software version by logging in to the stat on the browser.
At the bottom of the first screen after logging in it says the copyright details followed by version number.
If it is below Version 1.6 then phone Heatmiser on 01254 669090, tell them you need to update the firmware on your stat.
They will need to take a deposit for the tool they send, £30, but if you send it back they don’t take the money.
When the tool turns up it’s very simple to update the firmware, basically remove the stat from the wall, plug it in the USB on the PC (this is purely to power the stat).
Plug the tool in to your PC via USB also and it’s a simple case of pushing the 8 pins on the tool on to the pin header in the stat. It’s very easy!
After updating to Version 1.6 I haven’t had a single issue with the stat.
Again, if anyone is struggling I am here to help. I can also update the firmware for you if you are local to me or bring the stat to me (I have my own update tool).
@John. You don’t need to send it to heatmiser for a firmware update. They send you a tool if you ask. I have one of my own (it’s a simple programmer, I got my own after they sent me one to upgrade from 1.4 to 1.6).
@MJ Not quite sure what you mean. The stat will always be sending a constant stream of data if anything is connected to it. But how is that connected to your battery life on your android? Unless your android is constantly connected to the stat via the app, in which case, close the app when not in use!
@Steve Send me the info on your router (manufacturer, model number, firmware revision) and I can advise on port forwarding. The info is usually in the config pages (192.168.1.1 or whatever the IP of the router is) or on a sticker on the unit itself.
For anyone interested, http://code.google.com/p/heatmiser-wifi/ is an awesome piece of homebrew code which helps log everything and makes it easy to optimise your settings. Plus it just looks damn cool.
Thanks Rich for your really useful replies. I’ll definitely be installing the heatmiser-wifi scripts on my Raspberry Pi in the near future :)
Hi all, Many thanks for trying to help. I’m running O2 broadband using ADSL2+ on a Thomson Speedtouch TG582n. Running firmware 8.4.4.J.AE
I’ve configured port forwarding to many items previously without issue, and have now set up the router to forward ports 80 and 8068 to the Heatmiser unit. Port 80 is allowing external access to the web server built into the unit via an external web browser via a dynamic DNS host. All is working perfectly on port 80 and when I probe port 80 I see it’s open.
However, If I probe port 8068 using GRC.com, it’s in closed/stealth mode.
I’ve checked all other settings to see if port 8068 is blocked due to any other setting, but can’t find anything. I’ve even tried selecting and deselecting UPnP just to see if it made any difference, but unfortunately it didn’t…
BUT… Having read all the details above, and checking the http://www.canyouseeme.org for port 8068, I’m told my ISP isn’t blocking it:
Your IP: 93.96.220.253
What Port?
Success: I can see your service on 93.96.220.253 on port (8068)
Your ISP is not blocking port 8068
AND – when checking the software version on the Heatmiser “homepage” it’s displaying “© Copyright 2011 Heatmiser UK – All rights reserved Version 1.3”
Now it’s making me think that I do actually know what I’m doing with port forwarding, and the issue has been the Heatmiser firmware all along!?!?
This does seem strange though as I’ve been emailing the Heatmiser support team “Alan Mee” and he’s never once mentioned the firmware in the unit, only that I’ve got a router issue…
Thanks again for any help you can give :o)
P.S. In the mean time, I’ll drop another email to Heamiser asking them about their firmware…
Hi all again,
My Heatmiser app has just upgraded to v2.1 so I thought I’d try it again. It’s a good job I did as the unit now connects!
However, all is not well with the app. As soon as it connects, I am shown the current status etc. with options to set temps etc. as it should. The buttons do work (set back, lock, and hot water,) but when I try to select the options such as holiday etc. the app stops and I get the message “”Unfortunately Heatmiser has stopped.”
At least I can at lest turn my heating on and off, even if I can’t do anything else!!!
It seems the issue is with their app rather than my router after all!!!
Lets hope Heatmiser get the app fixed asap :o)
Sounds like your port forwarding isn’t the issue if canyouseeme is saying it can connect successfully and if you have done it fine for other ports.
The first thing I would do is upgrade the heatmisers firmware (beware, it does reset the settings when upgrading the firmware so make a note of them).
Which app are you using? iPhone or android? I just checked the android version and all seemed to work OK for me on v2.1 app and 1.6 firmware.
I’m accessing the unit from a Samsung Galaxy S3 running ICS and touchwiz 4.0. ie. the latest phone and software! Heatmiser version 2.1 on my phone.
However, my stat software is v1.3…
I’ve got Heatmiser support looking into it too at the moment. I’ll keep you all updated :o)
Thanks again.
Hi there,
Well what can I say, having real problems setting up the following:
I have the thermostat connectd to the wifi but cannot get the receiver working…..it wont pair or do anything of the sort.
would b grateful of any help please
if anyone is willing to travel to north east of england and set mine up then go for it, obviously I`ll pay travel costs plus costs for setting up
problem fixed, moved thermostat into closer location to the receiver, now works a treat
@rich where did you get the tool to upgrade your firmware, is there’s a schema to build it myself ?
Hi JL – I can answer your question (or at least part of it) – Heatmiser will send one out to you but they require a £30 deposit which is refundable if you return the programmer promptly. Not sure what the situation is with international shipping or whether they’ll send you the details required to build your own though.
Received my PRT-TS WiFi today and had an immediate problem when I connected it to my MacBook.
Although the screen lit up there was no data connection i.e. it did not appear as a USB Storage device and the WiFiUtility failed with an error message saying something to the affect that there was no connection. I called HeatMiser support and they said that there was a problem with the USB on Mac hardware and suggested that I use a Windows machine. When I asked if they progressing this fault they said that the fault lay with Apple not HeatMiser. Luckily my neighbour allowed me to configure the wifi settings on her laptop.
Anyone aware of this problem?
The second problem arose when I connected the power cables. I had the required 3 wires plus earth on my old Honeywell T40 thermostat. One black connected and two red. One of the red was connected to the L terminal so I assumed that this should be connected to the L terminal on the Heatmiser. However after finishing the connections and switching on the power the thermostat showed no signs of life. Turns out that the old Honeywell wasn’t too fussy about how the live and switched live were connected. As I didn’t have a multimeter I had to use an old light fitting to finally establish which wire was supplying the power. After rewiring and switching the power on again I was glad to see the HeatMiser coming to life.
Setting up port forwarding presented no problems and I have been able to connect remotely via the iPhone app and Safari.
Just wanted to say that I bought an PRT-TS WiFi thermostat today and found this article to be very helpful.
Unfortunately, my unit has firmware v1.1 installed which I think is a disgrace – I bought the unit directly from their shop so assumed it would run the latest software.
Does anyone know what the latest version is? Does the latest version allow on/off schedules for each day (mine only allows weekday/weekend which is too basic for the £185 purchase price!).
Thanks for letting me know, Alex.
Hi,
I can help (a kittle) with the 8068 port forwarding. I’m a Be customer (O2) and I couldn’t get my TG587n V2 to do the necessary port forwarding. However, I use Astaro as my domestic firewall, so I used it to direct the traffic to the IP address of the Heatmiser programmer. To do this, I decided to put the router in Bridge/Modem mode – which disables the wireless (though I read somewhere that you may be able to get it back should you telnet into the router – don’t hold me to it)
Now, in exchange, I’d appreciate some assistance. I have a Y Plan CH system. That has wires connected to Live & Neutral for the power; CH On – no CH off connection; HW On and HW Off. Initially I was sent the non-WiFi kit with the RC1-WTS receiver. This worked fine – once live was connected to the COMmon – to feed the outputs when they are switched (on). However, the RC1-W has no common and (as shown in the documentation) you have to conect the Live to A1 and B1. A1 is the (redundant) CH Off and B1 is the HW Off.
By making the HW Off output permanently live it permanently sets the three way valve actuator to HW Satisfied and (when the HW is on) you get a runaway situation on the CH system since the system is in HW mode to drive the boiler and in CH mode at the valve – without the regulation of the CH thermostat since it is not part of the control loop. The result is lots of hot rooms and no hot water!
I’d be really appreciative of any suggestions as to how to get it to work – before I send it back or have to rewire the heating system – which is otherwise fine.
Thanks Ken for the tip on port forwarding. I don’t have any suggestions on getting the thermostat to work properly with your central heating system. Have you tried contacting Heatmiser to see if they can help?
Hi Alex, I’m not sure what the latest firmware version is. However I have version 1.2 and I’m afraid to say it still only supports weekday/weekend schedules rather than full per-day scheduling. However the Heatmiser product site says that it does support 7-day programming, so maybe you just need a firmware upgrade.
To upgrade your firmware, you need to contact Heatmiser and supply your credit card details so they can send out a programmer – they will charge you £30 if you don’t send it back on time. I haven’t done this yet because it seems like a bit of a hassle, and the current firmware does everything I need. Shame that you can’t just update the thermostat via Wi-Fi or USB – seems like an obvious feature so I’m not sure why it has been omitted.
Hi Ken
Hope it’s not to late but I had the same problem and found this:
http://www.diynot.com/forums/plumbing/hw-off-in-y-plan-system-with-additional-relay.342386/
You need to register to see the wiring diagram.
Essentially the MPV needs a signal to tell it hw is off even though it’s obvious because it doesn’t have a hw on signal. So you use a n/c 230v relay to create a live whenever the hw on isn’t live. Hope this helps.
Hi all, just found this site. How do you tell which firmware version you’re on? And can anyone tell me what’s changed in each version? Can’t find this info on the heatmiser web site.
Thanks
Jon.
OK, read the thread properly and discovered I’m on 1.1. I think this might explain some of the issues I’m having…
Hi all !
I also have a PRT-TS wifi that works like a charm, ordered the thing in December 2011 (yes, one year ago… ;-) but only connected it a week ago… So far I can say that I’m pretty happy with my purchase.
Being a Mac only guy I can report one thing :
– The virtual drive (like a USB drive) that should mount when connected to the Heatmiser via USB (to enter network settings with wifiutility) is no longer supported by Mac OSX under 10.7.x Lion and above (including 10.8.x Mountain Lion).
– Though, under 10.6.x Snow Leopard it mounts fine and I was able to use the wifiutility that is provided by Heatmiser for Mac users. Fortunately I still have a MacBook under 10.6.8 that did the job.
– The problem is caused by the odd/old format of the drive : FAT12 … (as shown in disk utility).
You may try fix it by installing OSXfuse on your Mac (I’ve not tested this yet but will do) : http://www.macupdate.com/app/mac/40156/osxfuse
@ D MCM
The problem you are reporting is probably related to what I explain above. Tested with 6 different machines under 10.6.x,10.7.x and 10.8.x and can confirm my diagnostic is right.
@ CHRIS BARNES
Regarding the weekday/weekend (5/2) or 7 days programing problem you report :
-Have you tried to change Optional settings on the PRT-TS device (on the device itself) as explained in the manual that I downloaded from Heatmiser ?
-> Set option #16 to 01 = 7 days programing enabled (default is set to 00 = 5/2 days programing)
It did the job for me :-)
Feel free to contact me if you think I can help more, particularly for those on Macs ;-) Get in touch with me here -> heatmiser(at)van(dash)dijk(dot)ch
Christian
The manual I talk about in my first post can be downloaded from this page (two pages, PRT-TS wifi manual is on page 2) : http://www.heatmiser.co.uk/web/index.php/docs/viewcategory/101-wifi-thermostat-manuals
Direct link to the manual for the PRT-TS wifi : http://www.heatmiser.co.uk/web/index.php/docs/finish/101-wifi-thermostat-manuals/285-heatmiser-prt-ts-wifi-manual
Wow, thanks Christian, some really useful information there! I’m happy with 5+2 days programming but will try out the 7 day option out of curiosity.
Hi Chris, hi all,
Your welcome, always a pleasure being able help.
Thanks to you for posting this very useful review, btw this page may well become the “semi official” help page/forum from Heatmiser ;-)
Chris, I noted that my post HTML tags (quotes) did not work… Could you please edit my post so it would be easier to read for those needing info.
I’m currently searching a way solving the main problem : being able to mount the damn FAT12 “USB disk” on Mac OSX 10.7.x Lion and 10.8.x Mountain Lion.
It should work without having to use a virtualized windoze (Parallels) or a Mac under 10.6 (Why the heck has Heatmiser used such an old/odd drive FS format… ?)
I’ll keep you guys posted if I find a solution ;-)
Christian
Christian, I’ve edited your post so hopefully it’s a bit clearer now :)
I don’t have a Mac (maybe one day…) so I appreciate your work on trying to solve the FAT12 issue.
Hi Christian
It’s good to know that someone is investigating the OS X problem and looking for a workaround other than having to use Windows. However I feel I should point out that I was running Snow Leopard (OS X 10.6.8) on my Macbook when I first encountered the problem. I’ve since upgraded to Mountain Lion.
Although I have my thermostat configured and don’t foresee any need to have to reconfigure it in the near future I think that it is something that Heatmiser should try to rectify as I don’t think Apple will do anything about it. Have you reported your findings to Heatmiser?
Hi D MCM,
No, unfortunately I’ve had no time do further investigate or report the problem… Sorry for that.
I’ll probably do during the christmas days.
No worry, I’ll keep you guy’s posted !
Christian
Hi all,
Thinking of getting one of these, but have some questions on the wiring before I do,and heatmiser don’t seem to respond!
My current thermostat has 2 wires plus earth, which I assume are live and switched live. If I purchase the kit with the receiver and thermostat, can I use the live and switched live for my existing thermostat as the power for the wifi thermostat? I understand that the thermostat will only need a power supply but not sure if I can wire it this way?
Any help appreciated
Dave
Hi Dave,
I fitted one of these to a holiday rental propty a couple of months back, it has been faultless. I used the WiFI thermostat with remote boiler control as I wanted to control water and heat. I used the original 2 wires and earth no problem but changed the connections at the boiler so that they were permanently live.
is your current thermostat just a room stat or also a timer? If there is a timer at the boiler end you may need to change things as I did. This thermostat will need to have a permanent live feed.